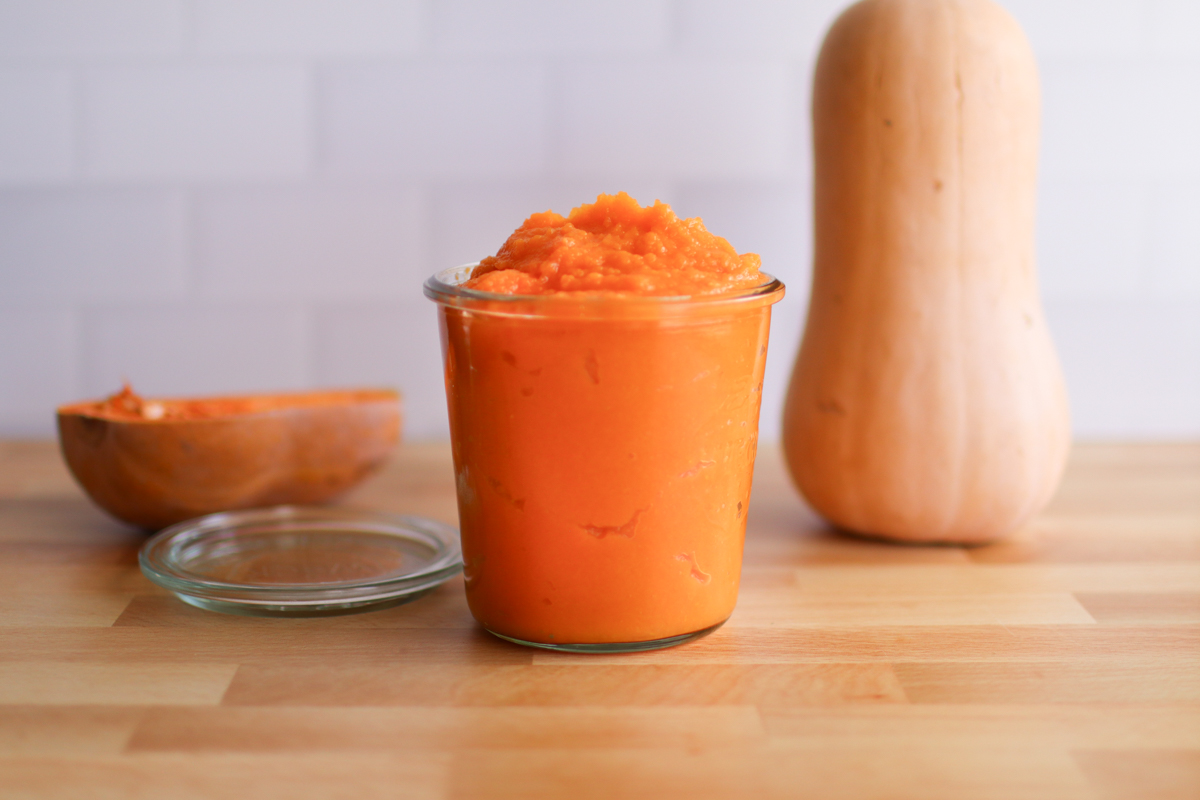
Homemade Butternut Squash Puree: Easy Steps for Versatile Meals
Welcome to the world of homemade butternut squash puree! If you're looking for a simple, cost-effective, and incredibly versatile ingredient to elevate your culinary creations, you've come to the right place. Crafting your own butternut squash puree from scratch is not only surprisingly easy but also yields a superior product to anything you can buy in a can. This comprehensive guide will walk you through every step, from selecting the perfect squash to storing your delicious, golden puree for year-round enjoyment, ensuring your pantry is always stocked with this vibrant staple.
Why Homemade Butternut Squash Puree is a Kitchen Essential
There are countless reasons to fall in love with making your own butternut squash puree. Beyond the satisfaction of creating something from scratch, its benefits touch upon flavor, nutrition, convenience, and sustainability.
- Unmatched Versatility: The applications for homemade butternut squash puree are truly endless. Its subtly sweet, nutty flavor and creamy texture make it an ideal addition to a wide array of dishes. Imagine enriching hearty winter soups, adding moisture and flavor to homemade breads and muffins, creating luscious pasta sauces, or even swirling it into your morning oatmeal or smoothies for an extra boost of nutrition. It’s also an exceptional first food for babies, providing a natural, wholesome option.
- Surprisingly Simple to Make: Don't be intimidated by whole squash! The actual "active" time required to make butternut squash puree is minimal. You don't need any special, expensive equipment beyond a good knife and a food processor or blender. Butternut squash is also a much more manageable size than larger winter squashes like pumpkins, making preparation far less daunting.
- Perfectly Freezer-Friendly: While some vegetables don't fare well after freezing, butternut squash puree is an absolute champion in the freezer. Unlike frozen butternut squash cubes, which can sometimes become watery or lose their texture, the pureed form maintains its creamy consistency and vibrant flavor beautifully after thawing. This makes it an ideal ingredient for meal prep, allowing you to stock up during peak season and enjoy the bounty for months to come. If you're curious about maximizing your freezer space and preserving your puree, learn all about how to Freeze Butternut Squash Puree: Stock Up for Year-Round Use.
- Superior to Store-Bought: Once you taste homemade, you'll likely never go back to the canned version. Homemade puree offers a fresher, richer flavor profile and a smoother texture without any added preservatives or sweeteners often found in commercial products. Making it yourself also allows you to control the ingredients entirely, ensuring a pure and wholesome product. Plus, it's a fantastic way to save money and reduce waste from packaging. Discover more about Why Homemade Puree Beats Canned for Flavor, Fiber & Value.
- Nutritional Powerhouse: Butternut squash is packed with essential nutrients, including high levels of Vitamin A (in the form of beta-carotene), Vitamin C, fiber, potassium, and magnesium. Incorporating this vibrant vegetable into your diet through puree is an easy and delicious way to boost your nutritional intake.
Gathering Your Ingredients and Essential Tools
Preparing for your butternut squash puree adventure requires just a few basic items. Here's what you'll need:
Ingredients:
- Butternut Squash: This is the star of our show! When selecting butternut squash, look for one that feels heavy for its size, has a dull (not shiny) skin, and is free of soft spots, cuts, or blemishes. Butternut squash typically matures on the vine and doesn't ripen further after harvesting, making it an excellent vegetable to stock up on. You can store whole squashes in a cool, dry, dark place for two to three months. Honey nut squash is a smaller, sweeter alternative that can also be used, though it will likely require less baking time.
- Olive Oil or Avocado Oil: A small drizzle of oil helps the squash caramelize beautifully while roasting, enhancing its natural sweetness and creating a more tender texture.
Tools:
- Sharp Chef's Knife: Winter squash can be challenging to cut, so a very sharp knife is absolutely essential for safety and efficiency. Always exercise caution and use a stable cutting surface.
- Large Spoon: For scooping out seeds and fibrous strands.
- Baking Vessel: A large cast iron skillet, a sturdy baking dish, or a standard baking sheet lined with parchment paper will work perfectly for roasting. Parchment paper is highly recommended for easy cleanup.
- Food Processor or High-Powered Blender: To achieve that silky-smooth consistency, a food processor or blender is key. If you prefer a chunkier puree (perhaps for certain soups or as a side dish), a sturdy potato masher can also be used, though it will require more effort.
- Airtight Storage Containers: For refrigerating or freezing your finished puree. Glass jars, freezer bags, or silicone ice cube trays are all excellent options.
Step-by-Step Guide to Homemade Butternut Squash Puree
Follow these simple steps to create a luscious batch of homemade butternut squash puree:
- Prepare the Squash: Carefully place the butternut squash on a stable cutting board. Using your sharp chef's knife, first, trim off about ½ inch from both the stem and blossom ends. Then, slowly and carefully cut the squash in half lengthwise. A good tip is to start cutting at the neck where it's narrower, pressing down firmly but with control.
- Deseed the Halves: Once cut open, you'll see the stringy pulp and seeds in the bulbous end. Use a large spoon to scoop out all the seeds and fibrous strands. Don't discard the seeds! Just like pumpkin seeds, butternut squash seeds can be cleaned, tossed with a little oil and salt, and roasted for a delicious, crunchy snack.
- Season and Arrange for Roasting: Lightly drizzle the cut surfaces of each squash half with olive oil or avocado oil. A little salt and pepper can also be added at this stage for enhanced flavor. Place the squash halves cut-side down on your prepared baking sheet (lined with parchment paper). This "cut-side down" method helps to steam the squash while it bakes, locking in moisture and ensuring a tender result. Poke each half a few times with a fork to allow steam to escape.
- Bake Until Fork-Tender: Preheat your oven to 350°F (175°C). Bake the butternut squash for approximately 45 minutes to 1 hour. The exact cooking time will depend on the size of your squash; larger squashes will naturally take longer. You'll know it's done when the skin is easily pierced with a fork and the flesh feels very tender. Once cooked, remove the squash from the oven and allow it to cool completely on the baking sheet. This cooling step is crucial, as handling hot squash can be difficult and dangerous.
- Scoop and Puree: Once the squash has cooled enough to handle comfortably, use a large spoon to scoop the soft, cooked flesh out of the peel. Discard the peel. Transfer the scooped flesh into the bowl of your food processor or high-powered blender. Process on high until the squash is completely smooth and creamy, with no lumps remaining. You may need to stop and scrape down the sides a few times to ensure an even consistency. If the puree seems too thick, you can add a tablespoon or two of water or vegetable broth to reach your desired texture. Conversely, if it seems too watery (which is rare with roasted squash), you can try draining off excess liquid before pureeing or gently simmering it on the stovetop for a few minutes to reduce.
- Enjoy or Store: Your homemade butternut squash puree is now ready to use! Enjoy it immediately in your favorite recipes, or prepare it for storage.
Pro Tips for Perfect Puree & Beyond
*
Flavor Enhancements: For an even richer flavor profile, consider roasting your butternut squash with a few cloves of garlic (peeled and smashed), a sprig of fresh rosemary or thyme, or a dash of cinnamon or nutmeg. These additions will infuse the squash with wonderful aromas as it bakes.
*
Storage Savvy:
*
Refrigerator: Once cooled to room temperature, your homemade butternut squash puree can be stored in an airtight container in the refrigerator for 3-5 days.
*
Freezer: For long-term storage, the freezer is your best friend. Portion the puree into freezer-safe containers such as glass jars (leave headspace for expansion), freezer bags (flatten them for efficient stacking), or even ice cube trays for smaller, individual portions. Frozen puree will maintain its quality for up to 6-8 months. Always label with the date!
*
Creative Culinary Uses: Don't limit yourself! Use your puree in:
- Soups: Creamy butternut squash soup is a classic, but try adding it to curries or stews for thickness and flavor.
- Baked Goods: Muffins, quick breads, pancakes, waffles, and even pies can benefit from the moisture and color of butternut puree.
- Pasta & Grains: Stir it into risotto, mac and cheese, or as a base for a creamy pasta sauce.
- Dips & Spreads: Mix with hummus or use as a base for a savory dip.
- Baby Food: A perfect, nutritious, and naturally sweet option for infants.
Conclusion
Making your own homemade butternut squash puree is a simple culinary skill that unlocks a world of delicious possibilities. From its unparalleled versatility and ease of preparation to its superior flavor and impressive nutritional benefits, this golden puree is truly a kitchen superstar. By following these straightforward steps, you can confidently transform a humble butternut squash into a valuable ingredient that will enhance countless meals and keep your family well-fed and healthy. Stock up during peak season, embrace the pureeing process, and enjoy the rich rewards of homemade goodness all year long!